Add your brand logo
How to add your brand logo to Smart Checkout payment pages.
Overview
Your brand logo can be applied to any payment source for online payments. Your brand logo can therefore be shown to customers across the following products, all of which utilise Smart Checkout payment pages:
- Smart Checkout
- Payment Tools (Quick Pay & Payment Notifications)
- Smart Checkout Plugins
Logo format
Your logo should be uploaded in transparent PNG format, 128 x 128 pixels (recommended) and up to 100KB in size.
Adding your logo
Within your Viva account (self-care), navigate to Sales > Online payments > Websites/apps to see a list of payment sources
Locate the payment source you would like to update. Please see the below table for additional guidance if you are using Payment Tools or Smart Checkout Plugins:
Product Payment Source Quick Pay This will simply be called ‘Quick Pay’ and is created automatically when you set up your Quick Pay link Payment Notifications If you have created a payment source specifically for Payment Notifications, choose that. If not, you can either create one or use the Default source Smart Checkout Plugins
(WooCommerce, PrestaShop, Shopify, OpenCart, Magento)Use the payment source you created when setting up the plugin. For Shopify, check for the correct Source Code in your Viva configuration within Shopify Click on the name of the relevant payment source to see the Edit Payment Source pop-up
Under the Company Logo heading, click on the Choose File button and browse to the location of your logo:
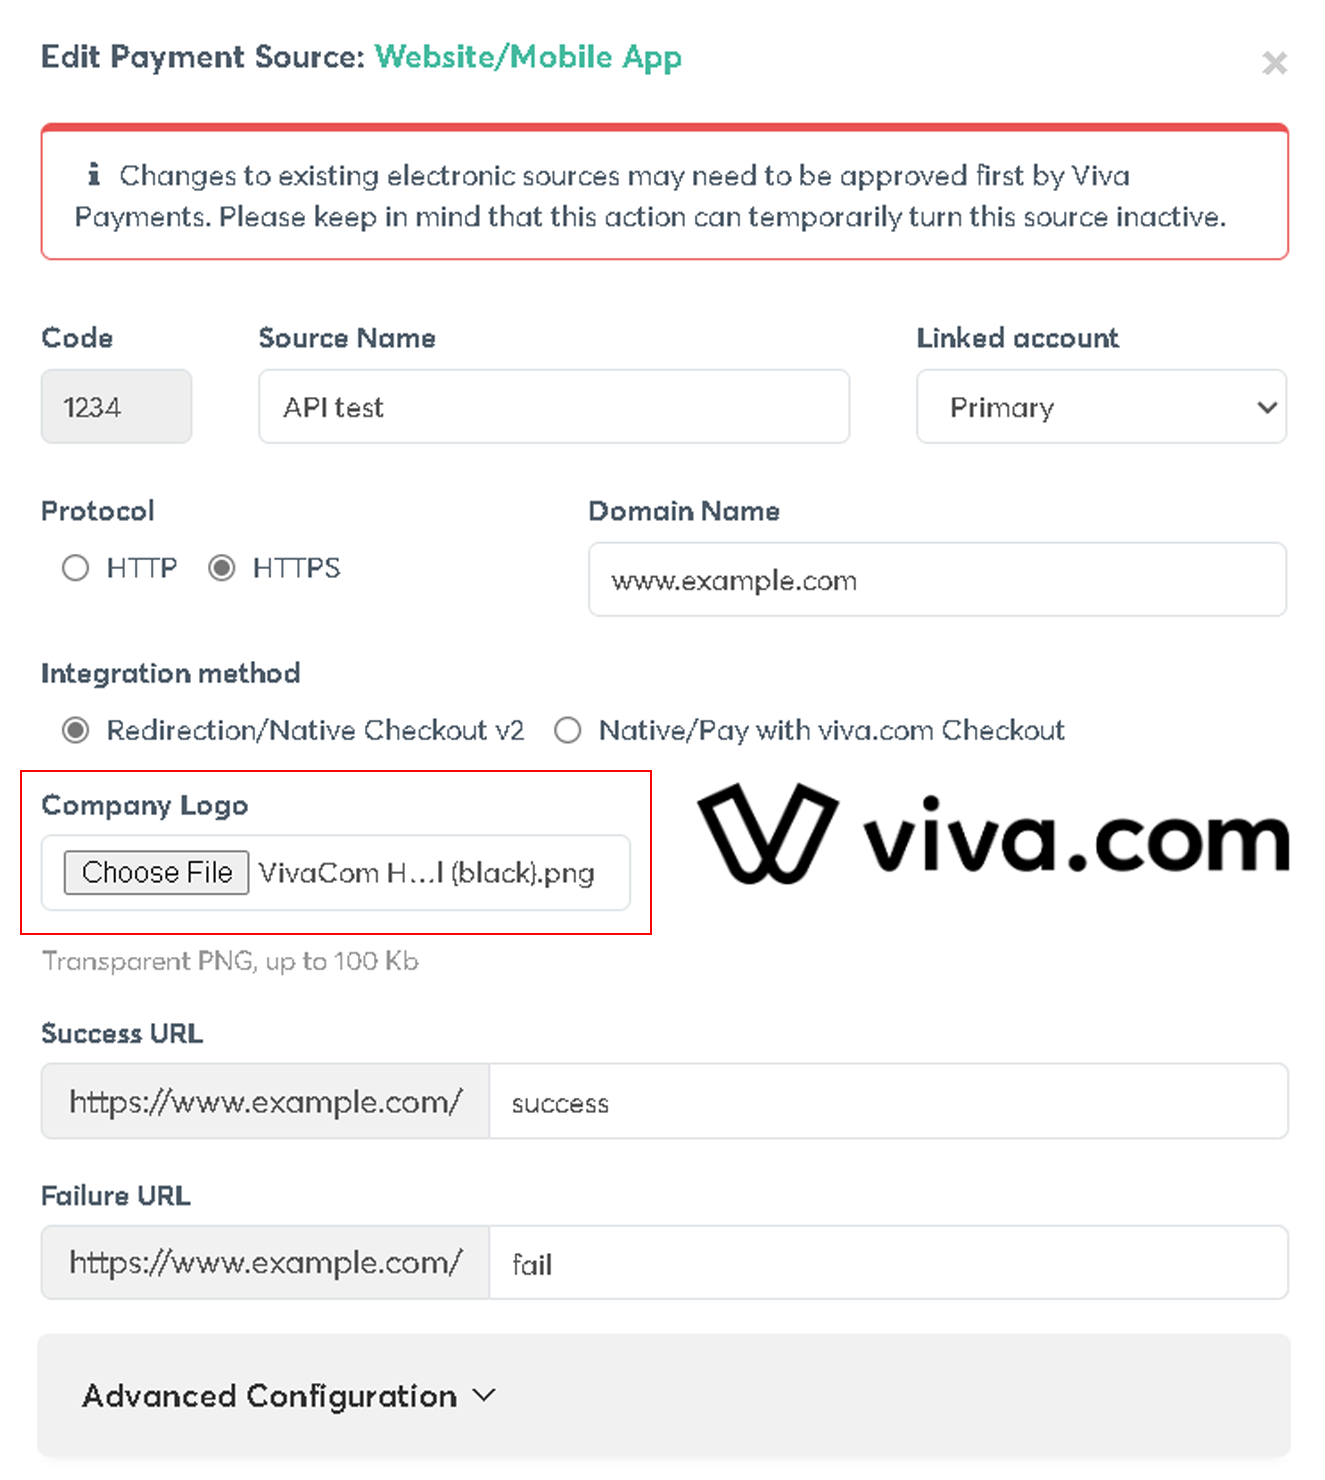
Once located, upload your logo. If the logo fits the size and format requirements, you will see a thumbnail of the new image to the right-hand side. If not, the “Transparent PNG, up to 100 Kb” text will flash red
Once the logo is successfully uploaded, select all the checkboxes at the bottom of the pop-up and click on the Update button to save the payment source
Now, when a customer reaches a Smart Checkout payment associated with this payment source, your updated logo will be displayed
Get Support
If you would like to integrate with Viva, or if you have any queries about our products and solutions, please see our Contact & Support page to see how we can help!