Quick Pay
Quick Pay allows you to accept payments via a permanent, shareable link.
Overview
Quick Pay allows you to create a unique permanent payment link that can be shared with your customers (this allows you to accept multiple payments from multiple customers using the same payment link). This gives you the opportunity to accept payments online from your customers into your Viva account without the need for an e-commerce shop.
Quick Pay links are always active, and the amount and description of the payment is specified by each customer according to their requirements. We’ve designed this with smaller merchants in mind, like personal trainers, teachers, freelancers or anyone with a small circle of customers who they know personally. The service is also suitable for all charity institutions or humanitarian activities who want to publish a link on all platforms to accept donations.
Supported payment methods
Quick Pay supports a wide variety of payment methods, including:
- Cards (Visa, Mastercard, American Express, Maestro, Bancontact, JCB, Discover & Diners Club)
- Certain Digital wallets (Apple Pay, Google Pay, Samsung Pay & Viva Wallet)
- Certain Local payment methods (BANCOMAT Pay, Bancontact QR, BitPay, BLIK, EPS, iDEAL, IRIS, MULTIBANCO, MB WAY, P24, PayU, Swish, Trustly, WeChat Pay & BlueCode)
- Certain Direct Debit & other payment methods (SEPA Direct Debit & Pay By Bank)
 |
 |
 |
 |
 |
 |
 |
 |
 |
 |
 |
|
 |
 |
 |
 |
 |
 |
 |
 |
 |
 |
||
 |
 |
 |
 |
 |
Getting started
To create a Quick Pay link:
- Visit register and click on Login.
The Sign in to your account page is displayed. - Enter your mobile number and password and click on the Sign in button.
The Viva account landing page is displayed. - Click on the Select button for the account you wish to view.
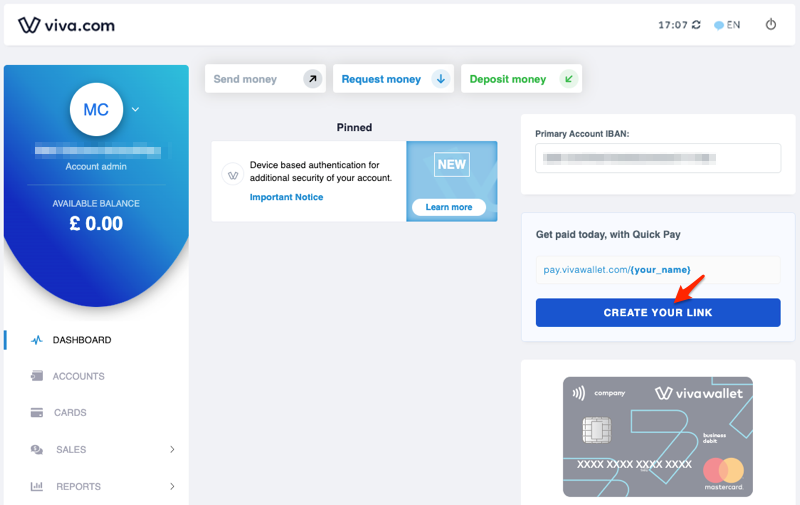
Your account dashboard is displayed. - Click on the Create your link button:
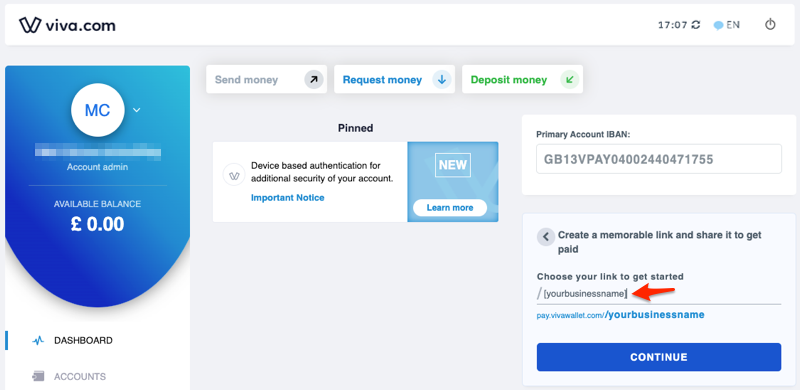
- Enter your preferred text for the link, e.g. business name, and click on the Continue button:
A message is displayed advising that you won’t be able to change the link once it’s created:
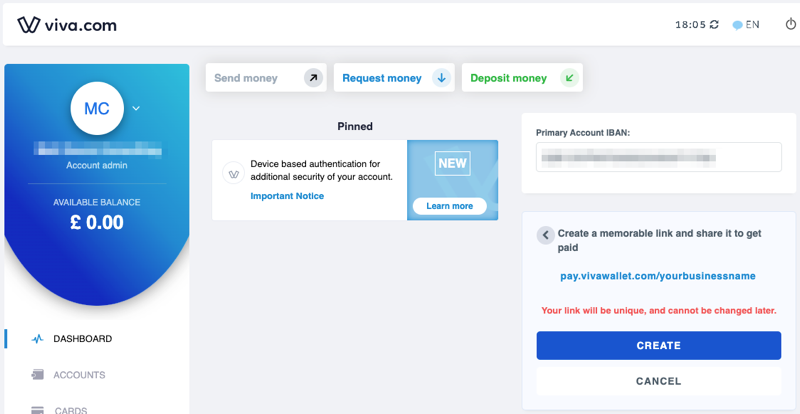
- Click on the Create button to display a confirmation message:
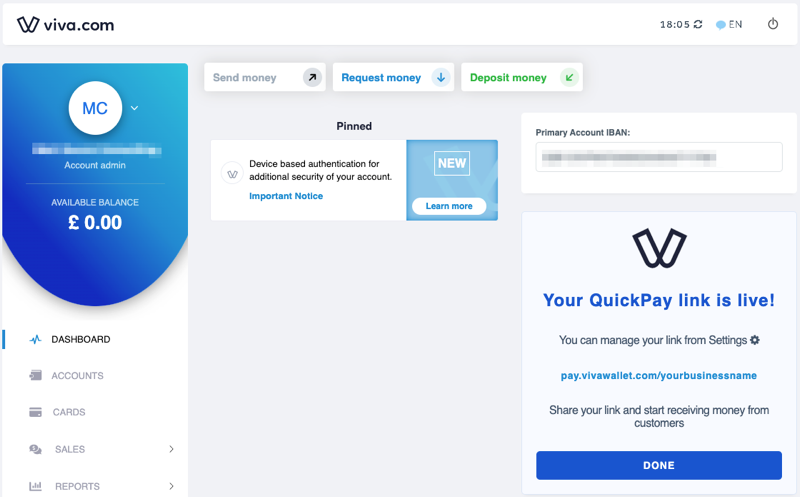
- Click on the Done button.
You’re now ready to receive payments. You’ll see a Copy to clipboard button on your dashboard which you can use to grab the link:
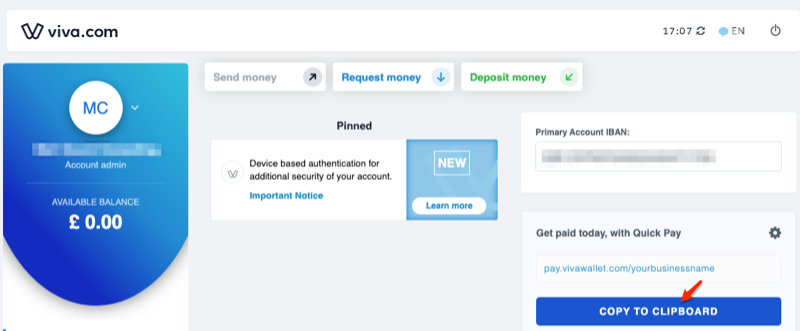
You can send via email or even share through a social media platform. The message that the customers see can be amended by clicking on the gear icon within the Quick Pay component on the dashboard:
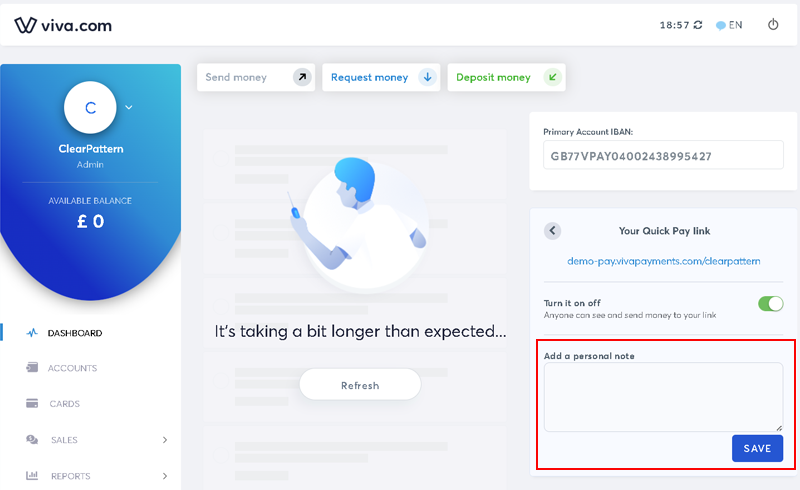
Simply edit the personal note and click on the Save button.
The below screenshot shows an example of what a customer sees when opening the link in their browser:
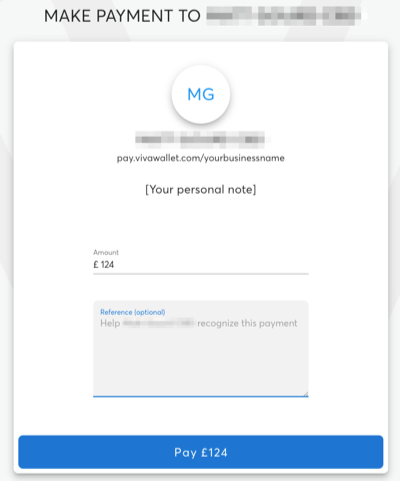
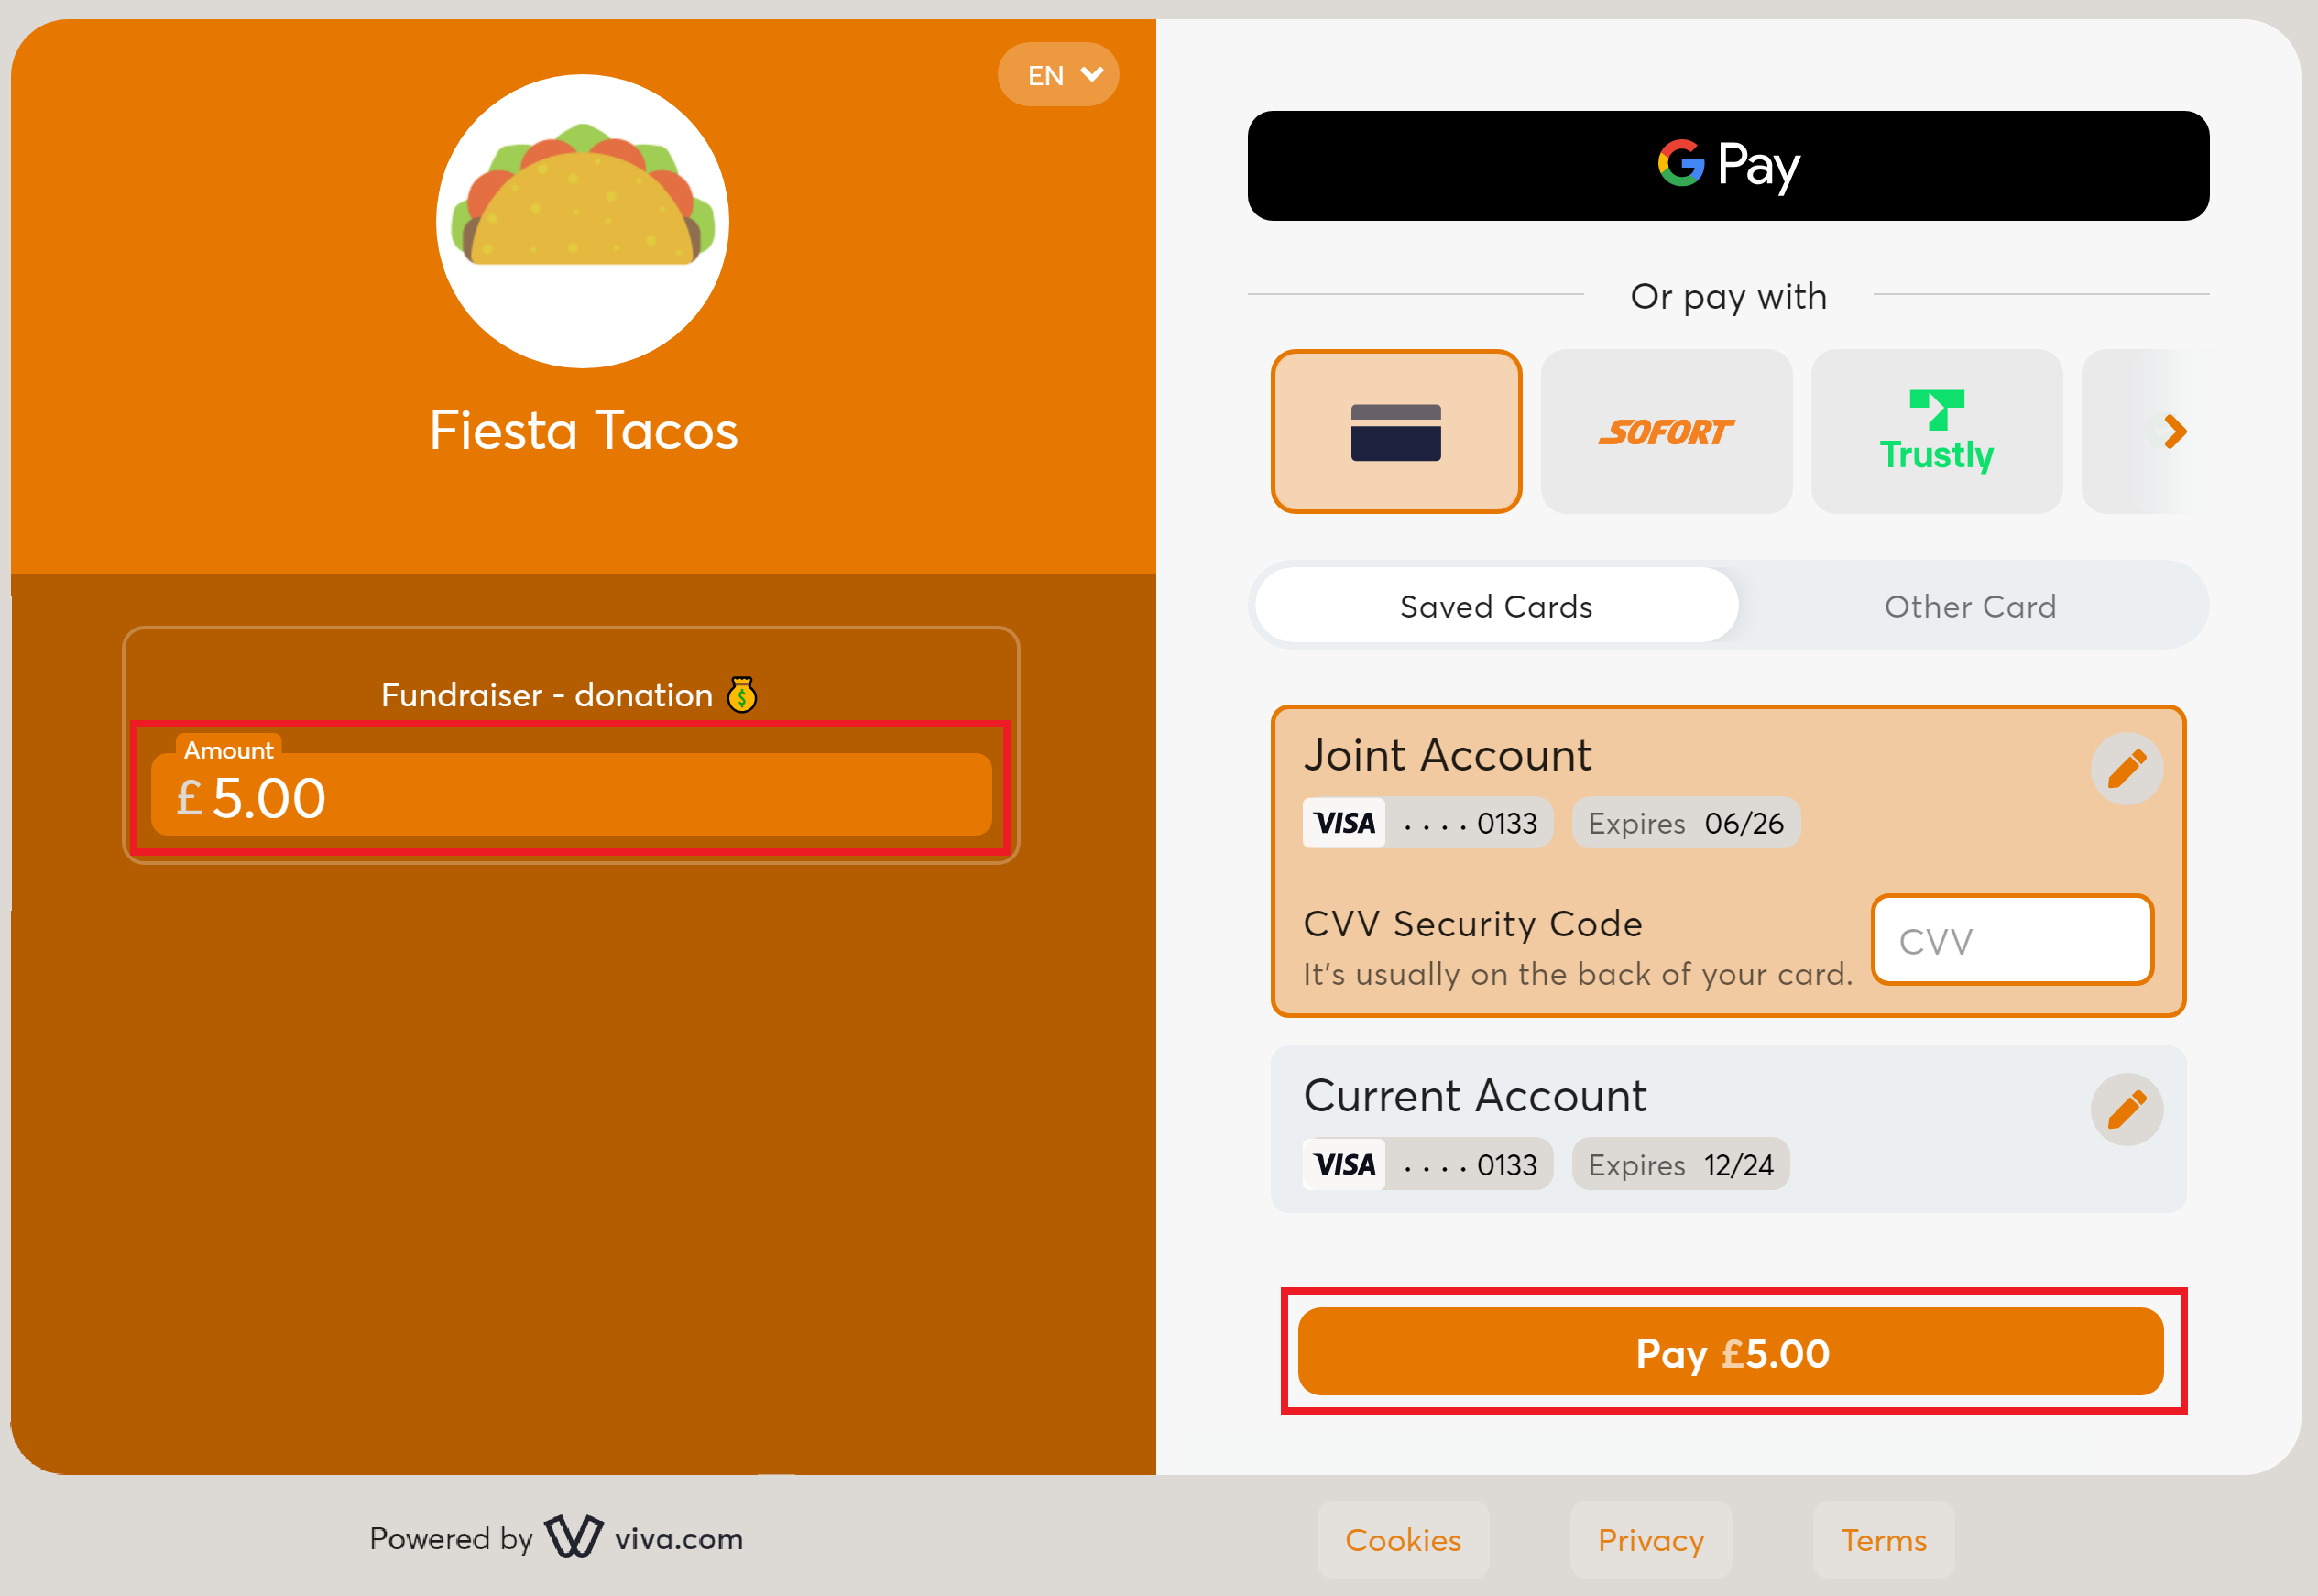
They just have to enter the amount they want to pay plus an optional description as a reference. After clicking on the Pay [amount] button, they’re redirected to the Smart Checkout payment page where they can enter their card details and submit the payment:
Adding your own logo
It is possible to add your own logo to display to customers when they are making a payment via your unique Quick Pay link. To do this:
- First ensure Quick Pay has been set up as per the getting started section above
- Then see our adding your brand logo tutorial for a step-by-step guide
Get Support
If you would like to integrate with Viva, or if you have any queries about our products and solutions, please see our Contact & Support page to see how we can help!